
REVOPOINT / 3D Scanning / Choose & compare
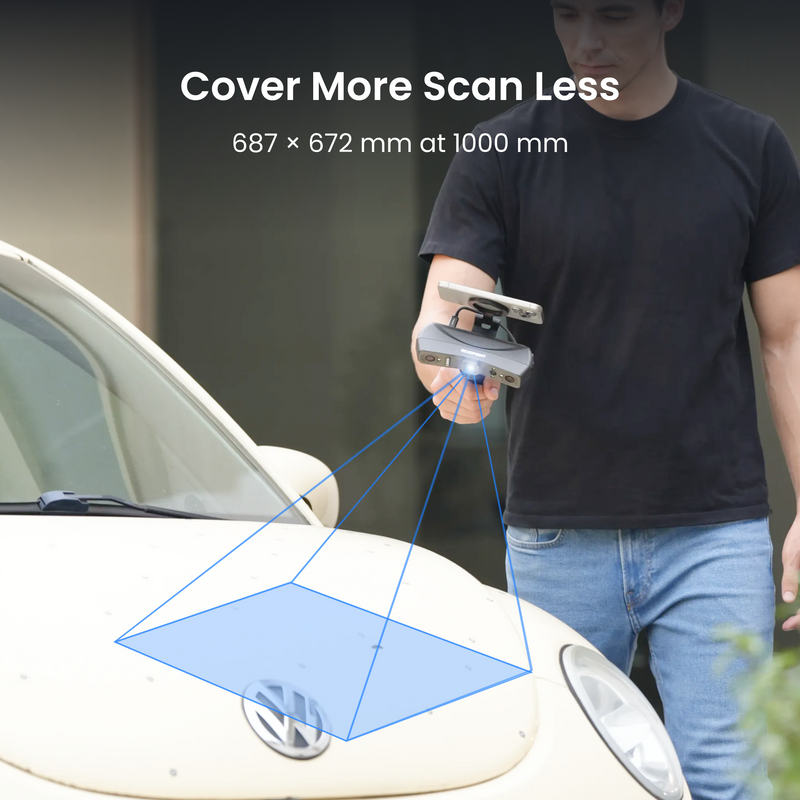
A sculpture, a furniture piece or a bulky workshop component presents a different scanning problem from a small desktop model: you need room to move and a plan for reaching every useful surface. REVOPOINT's RANGE 3 series focuses on that wider-area workflow. Before ordering, check the exact model and package. The Creality AU listing is currently marked pre-order; confirm current lead times with the store if your project has a deadline.
1. Start with the object, not the headline specification
Write down what you want to capture and what the finished model must do. A visual reference for a sculpture is not the same brief as a component that must fit another part. Identify the areas that matter: the overall silhouette, a curved surface, mounting points or an edge you will rebuild in CAD.
RANGE 3's wide-area capture is aimed at medium-to-large objects. That makes it worth considering when coverage and moving around the subject are central to the job. If your real priority is a tiny feature, review that requirement separately rather than assuming a larger scanning area guarantees the detail you need.
2. RANGE 3 and RANGE 3 Pro are not the same scanner
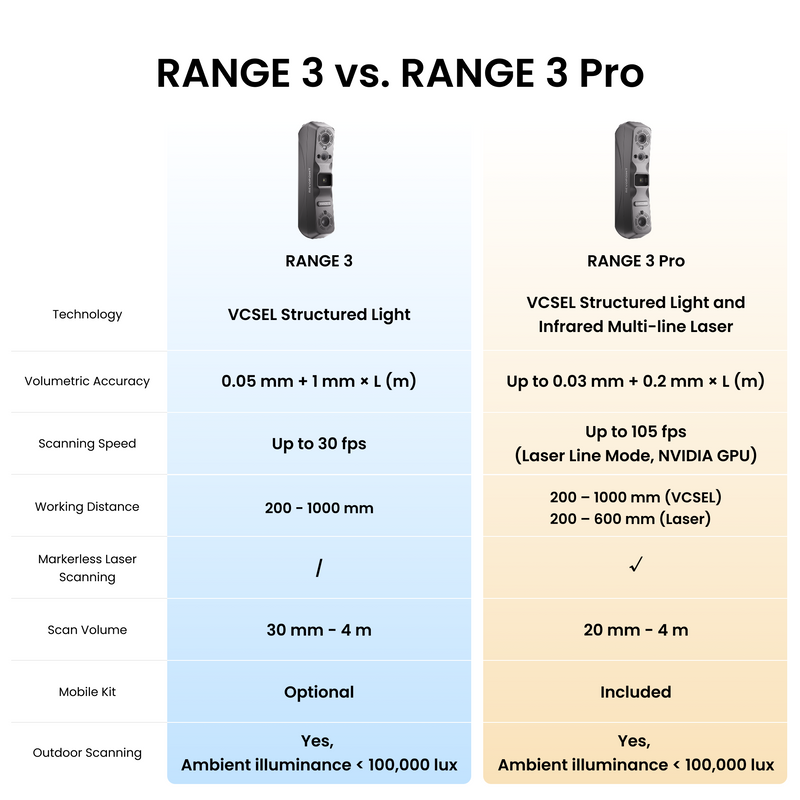
The standard RANGE 3 uses VCSEL near-infrared structured light. RANGE 3 Pro retains that mode and adds 11 parallel infrared laser lines. REVOPOINT positions VCSEL for wider overall capture and the Pro's laser mode for finer local structures.
Choose around the work you actually repeat. Broad shape capture and occasional local-detail work deserve different priorities. Do not assume every feature shown in a series-level launch graphic applies to both versions: scanning modes, tracking options and supplied accessories need to be checked against the selected model.
3. Plan the wireless setup before you buy
Both models support Wi-Fi 6 and use Revo Scan 6. REVOPOINT lists Windows, macOS, Android and iOS support, but an operating-system name alone does not establish that your particular device meets the requirements. Check its processor, memory and graphics against the current requirements.
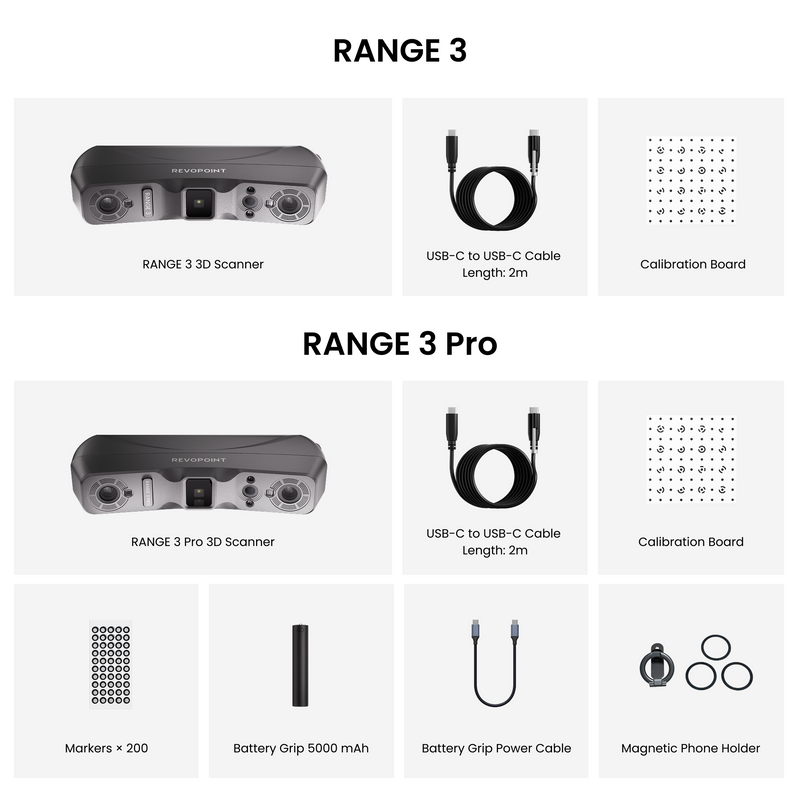
Wireless data transfer also needs a suitable power arrangement. Confirm the battery grip, phone holder and other accessories included in your local package. REVOPOINT lists visual colour tracking as PC-only with a dedicated GPU requirement, so do not plan a phone-only workflow around that feature.
4. Make the first scan a controlled test
Give yourself a clear route around the object. Look for awkward undersides, recesses and areas hidden by supports before starting. Decide which surfaces are essential and which can be captured after safely repositioning the object.
Begin with a manageable section, then inspect it before committing to the whole job. Check whether the surfaces you need are present and whether the model makes sense at the intended scale. A short test also helps you assess lighting and surface preparation; transparent or mirror-like surfaces require particular preparation, not just another pass.
5. Decide what happens after capture
A scan is a starting point, not an automatic finished design. Allow time to review coverage, remove unwanted data and prepare the model for its next application. For a replacement component, keep physical measurements and a test-fit step in the plan.
If you are still choosing your approach, read our REVOPOINT workflow buying guide. Before handing files to another application or person, use our STL, OBJ and PLY guide to decide what information the export needs to retain.
Choose your REVOPOINT RANGE 3 setup
Ready to narrow it down? Check the RANGE 3 and RANGE 3 Pro options at Creality AU, then confirm your chosen package, device compatibility and current pre-order lead time before purchasing.
Check RANGE 3 pre-order options →Original Creality AU guide informed by REVOPOINT’s October 2026 launch material and manufacturer information, checked on 3 November 2026. Original images supplied by REVOPOINT and used with permission. Check the selected local model, package and current pre-order terms before purchasing.